by James Williams
A sump pump helps keep the water out of your basement. Did you know that more than 60% of American homeowners have to deal with the flooded basement? No, I’m not making this up. This is according to the American Society of Home Inspectors.
A lot of homes suffer from below-ground wetness. Homes that are primarily in places where raping melting of heavy snow occurs. If you live in a low-lying area, there is a high probability that you have to deal with flooded basements.
Be aware that it doesn’t take much water to cause damage worth of thousands of dollars. But there is a common fixture to this problem, and this is a sump pump. In this article, I’m going to show you how to replace a sump pump in an easy way.
This will probably be the easiest DIY project you have ever done or will do for the first time. There are some common signs that should tell you when it is time to replace your old pump a get a new one.
Most sump pumps should easily last for years. However, proper maintenance is required to keep it functioning. And this is where most homeowners make a mistake. Since the pump is mostly hidden and out of sight, it’s very easy to forget about it.
However, if you have a pump that has been running for a long time, it’s a good idea to check that out now. Common problems that you are likely to run into are loud noises, irregular cycling, shaft damage, etc. Also, if the pump is older than ten years, you are probably due for a pump replacement.
The first warning sign is the noise. Now, all pumps will make some sort of noise, but it isn’t loud enough to be heard from the living room. If you can hear a loud noise from the basement, this is a clear indicator that something is seriously wrong with your sump pump.
The reasons might be a damaged motor, improperly installed pump, or an old motor that is struggling to pump out water.
A sump pump should never run constantly. If it starts doing that, then there is some serious problem with your old sump pump. It is at the end of its life cycle, and you should change it. That’s all there is to it.
However, there is also a slight chance that the float switch is jammed, and you might end up just fixing that instead of replacing the whole unit.
Changing out your old sump pump is fairly straightforward. It might look daunting at first, but let me assure you, it’s by far the easiest project you will probably do around your house.
Before you pick a sump pump, make sure to get the correct size relative to your sump pit. You should also make sure the pump has enough power to keep all the water out of your basement and keep the area dry.
If your existing pump has been reliable to you for a long time, try getting the exact model or preferably an updated version of that model. That way, you can expect the same life expectancy and reliability.
However, if the primary pump failed due to the reason that it wasn’t powerful enough to handle the water volume, you might want to consider getting a powerful model.
Now, let’s get back on the track. We are talking about replacing an old pump and installing a new one. This makes the process much easier because replacing an old pump is a lot easier than installing a new one in the first place.
Since we are talking about replacing, you don’t have to dig any trenches and lay any pipes. You just have to take out the old motor and put a new one. With that being said, let’s have a look at the process and learn how to replace a sump pump.
The first step is to unplug the old pump. Remove the wires, covers, and shut off all electric cables to make sure to current is passing to the pump. If you have any protective cover over the pit, remove that too.
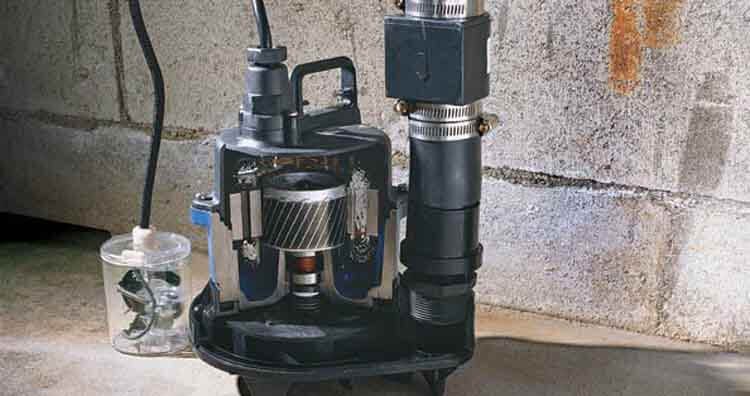
Now that you have unplugged the old sump pump, it’s now safe to handle. Now, it’s time to disconnect the unit from the PVC pipe. Carefully examine the structure as see what pipes are connected to the old pump.
Remove anything that is attached to it. You can try cutting the pipe with a hacksaw because you will be installing a new one. Try to cut the new PVC pipe into a suitable length to give you some extra mobility when you are installing the new sump pump. Once you are done, pull out the old pump from the sump pit.
The length of your old PVC pipe that is connected to the old pipe and the length of your new PVC pipe should be the same. In most cases, it is either 1-1/2-inch or 1-1/4-inch pipes that are used to connect to the discharge line.
Use a similar length of pipe to connect to the new pump. It’s easier to trim down a long pipe, but if it’s too short, you just bought yourself some extra hassle. That’s why it’s a good idea to cut the PVC pipe longer to give you some mobility.
On the pump, there is a discharge outlet. Locate it, attach the pipe you have just cut with an adapter. Make sure the seal is completely watertight. You can use PVC glue or purple primer to create a bond. After that, give it some time to dry.
This is a crucial step. You don’t want to put the new pump to close to the walls. Make sure it isn’t leaned against the basin wall. Also, don’t place your new pump too close to another pump. Keep the wires out of the way to avoid the pump from getting entangled in the wiring.
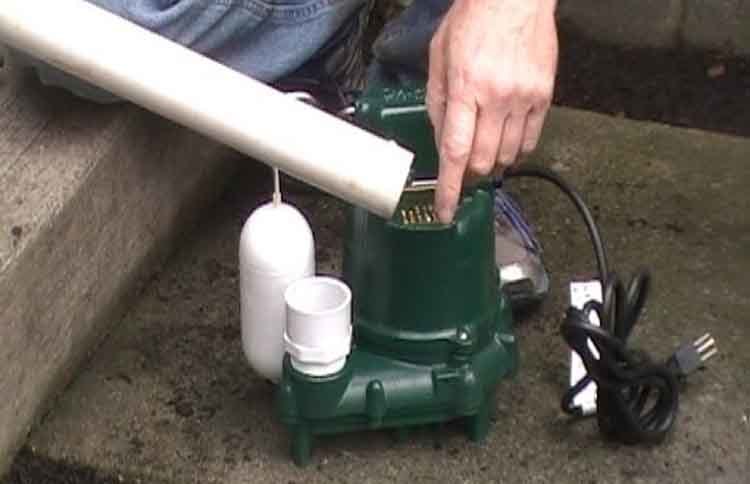
Keep the pump level at all costs. For that, you can place shims beneath the pump or use a level to ensure it is not swinging about the base of the sink and is flat against the floor.
This switch is what sends the signal to the motor. If it is too high, the motor will not start in time, and if it is too low, it will run constantly. That’s why you need to keep it positioned at the correct height and keep it unobstructed.
Make the connection with the discharge line using a check valve if you have taken the valve out while removing the old pump. After that, connect the new discharge line with the pipe.
Alternatively, you can also use a connector if you don’t have a check valve to fuse the pipes. The reason why the check valve is important is that it keeps the pumped-out water from getting back into the basin. For details discharge guide available here.
The final step is to test out the new pump. You can do the by filling up a large bucket of water and start pouring it into the sump pit. Make sure all the cables are properly connected, and the sump pump is turned on. This is a test to make sure the pump is working properly.
Since you are doing all the hard work, the cost would be the cost of products purchased to make the installation. The total installation cost would be around 300 dollars depending on the type of pump you install.
Other cost includes the cost of glue, pipes, adapters, and fittings. However, keep in mind that the cost would easily double if you hire a plumber to do all the work for you.
If you are not confident about this, by all means, hire a plumber. I hope you now know how easy it is to replace your old pump and put in a new one.

About James Williams
Hi, This is James from HomerDIY. I have great experience in writing about everything related to Pump and DIY tools. For the last few years, I am researching the different types of tools and sharing my opinion on this blog.
 |
 |
 |
 |
Popular Posts
 Homer
Homer