by James Williams
There are many areas around your property that can have gates. Oftentimes, when we try to go through a gate we are carrying items and are unable to lift the latch on the gate. If you ever find yourself being inconvenienced by a gate you should highly consider investing in an automatic gate opener.
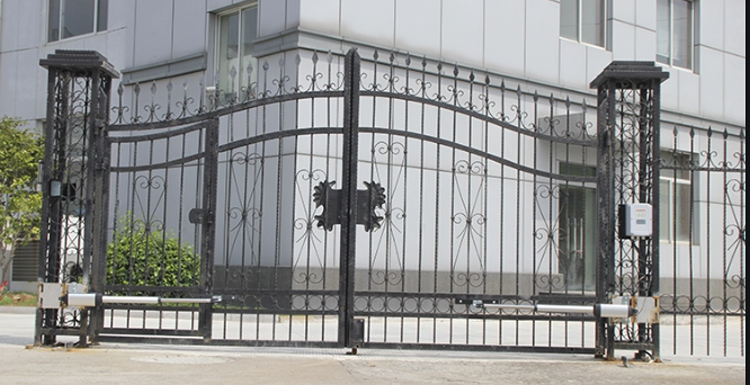
Automatic gate openers can be installed on your driveway gate, privacy gate, or any other gate that you may have. They allow you to have increased privacy, added safety, increased convenience, and added aesthetic appeal.
If you are looking for the best upgrade to make to your property today you may highly want to consider installing an automatic gate opener.
Before trying to jump right in and start the installation process it is crucial that you get the gate ready for the installation process. You will likely be able to install a gate opener to your gate, however, your gate must meet a few requirements before even starting the process.
If your gate has wheels it will not work. You must either remove the wheels or use the gate opener on another gate.
The gate must also be able to swing on its hinges freely when it is open. If the gate requires you to push or pull it open hard you will not be able to use an automatic gate opener.
Before starting the process you should also inspect the gate to ensure that it is all in good condition. If you notice any part of the gate that is wearing you should make necessary replacements.
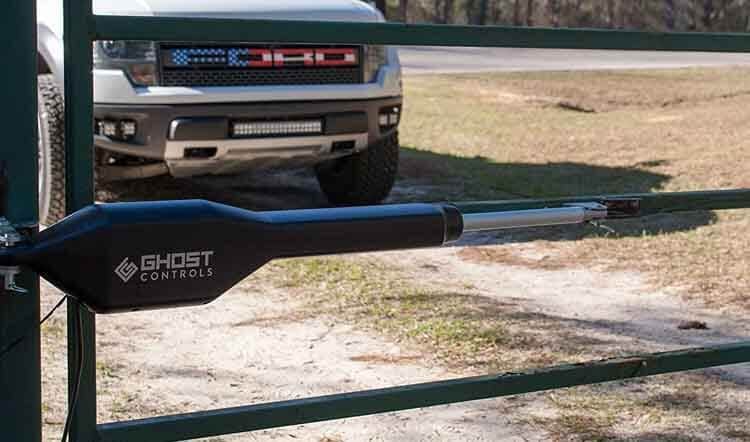
The first thing that you must decide is where you want to position the gate opener. The position can change depending on the situation, however, most people will recommend positioning the gate opener in the middle of the gate to help prevent the gate from twisting when opening and closing. If the opener is placed on one side it may cause the gate to flex and bend.After deciding where you want the gate opener positioned on the gate you will need to hook up the post bracket assembly. You will need to follow the instructions that come with your specific gate opener to fully assembly the post bracket. Once it is set up you can connect this part to the back side of the opener.
Then you must connect the bracket to the front of the gate opener while the gate is open and the arm is retracted. You should then ensure that the bracket and post bracket assembly is level to ensure an easy open and close. You can use C-clamps to keep these items in the correct position while you install the other parts.
The next part you need when installing gate opener is to install is the opener arm. This arm should pair the post bracket assembly with the bracket of the gate.
The arm must be level when you are installing it. The next thing that you need to install is the stop plate of the gate. To do this you need to position the gate in the closed direction and pair the stop plate to the frame.
When the gate post and the stop plate are touching you can tighten the hardware. Then, you need to put the gate open and pair the opener arm to the bracket.Most automatic gate openers feature a control box. If yours does you should mount it about one meter off the ground and the same distance away from the power source.
When you are dealing with electricity and installing gate opener you need to make sure that you are extra careful. If you are not careful you can severely hurt yourself or anyone else that is helping you.You need to first connect the battery wires. To do this, run the wires through the control box and attach the wires to their correct locations. They should be labeled for easy access. Once the wires are connected you can connect the power cable to the correct terminals that are often marked by different colors.To get power to your automatic gate opener you will either need a transformer or a solar panel. These sources will supply power to the battery to ensure that your gate will efficiently open and close. Once you connect the solar panel or the transformer to the battery you need to connect the battery. You should attach the battery wires to their correct locations.
Since all gates are different and are in different locations you will need to customize your automatic gate opener to fit your needs. The controls on the control board allow you to adjust the gate and its functions to your exact desires. For example, you will need to control for where you want your gate to close. You need to do this so that the gate does not force itself closed and ruin the gate closure and battery.
You can also customize the auto-close time so that your game automatically closes at a specific time of the day. This can help increase the amount of security and privacy that you have in and around your home. There are many unique customization that you can choose from. The ones that you choose to set should be completely up to you.
If you are considering an automatic gate opener you should highly consider installing it on your own. While it may seem intimidating, almost anyone can install their own automatic gate opener if they read the instruction manual and follow these simple instructions.
Automatic gate openers provide you and your family with added convenience, security and privacy. You will no longer need to guess if you left the gate open or closed and instead you can just hit a remote control button to have added reassurance that everything is okay.

About James Williams
Hi, This is James from HomerDIY. I have great experience in writing about everything related to Pump and DIY tools. For the last few years, I am researching the different types of tools and sharing my opinion on this blog.
 |
 |
 |
 |
Popular Posts
 Homer
Homer