by James Williams
Inside doors are an important part of there any home, and so learning how to install them is a highly useful skill. The only way to gain the skill is by doing the work but you can start by reading about the process.
Getting the initial knowledge for doing a particular skill by reading about it is the all-important first step learning a new skill but not the only one.
The exact process of installing a door will vary depending on the situation. If you already have a door in that location, you will need to remove it. You also need to consider whether or not you can reuse the door jamb. The following steps involve installing a door once any previous door and door jamb have been removed.
You need to make sure the door fits the opening. If the door is larger than the opening, it will not fit. If the door is considerably smaller, you may not be able to put enough wood between the jamb and the frame to make it work.
Checking the level of the floor is a critical step because if the floor is not level you will end up with a crooked door. Once you use a bubble level to find out how much the floor is off being level, you know what is needed to make it level.
After you find the level, you need to cut the part of the jamb that will be on the high side of the door. This procedure will make the door level even if the floor is not.
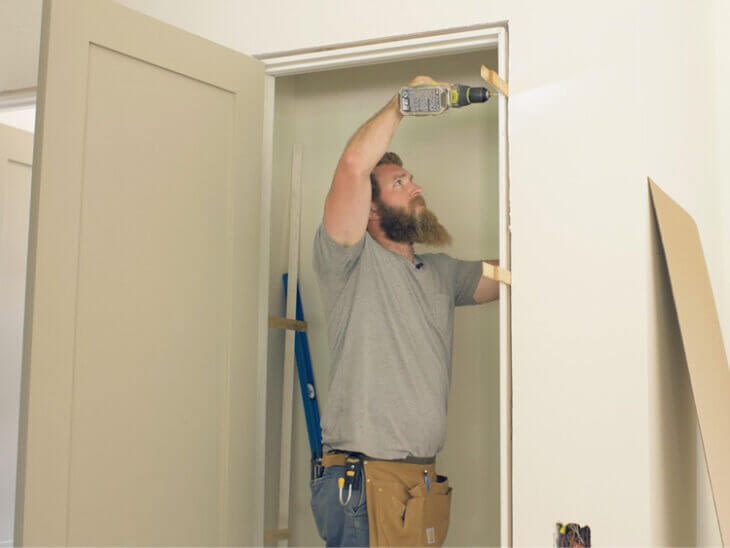
Putting temporary blocks on the jamb will give you a way to hold the door in place while you are working on it. This step consists of four blocks capable of holding it to the door frame until you finish securing it.
After placing the door jamb in the frame, the next step is to level it using small blocks of wood as needed. To do this, you first bring back the bubble level to check to see how long will the jamb is. This part may require checking the Jamb level several times.
Nailing the blocks on the jamb to the wall supports it as you shim and nail it to the framing. These are temporary supports that hold the jamb in place well you are getting the door jamb properly aligned.
In this step, you check to see if the door is opening and closing properly. The door should contact the door stop evenly along its entire length. If it does not do so additional alignment of the door jamb will be required until the door works properly.
At this point, you remove the center screw evolve three hinges. After which, you slide wood behind the hinge. If the gap is more than three-eighths of an inch, you should add wood on both sides of the jamb. After you finish this, nail them with three two-inch fifteen gauge nails.
To further secure the door jamb add longer screws do each of the door hinges to secure them through to the frame. To make sure that you have not thrown the door jamb out of alignment open and close it after adding a screw.
After this, you go to the other side of the door jamb and screw it down, you want to secure it by the door latch to make sure that it will handle even a hard slam. You should also secure it in several different places to give it strength.
Once this is completed, it is time to trim the wood used between the door jamb and frame. That is the need to be cut back so that they are even with the door jamb and frame. This is necessary to get the excess water out of the way.
Once you have the door jamb secured, it is time to remove the temporary blocks. Removing this temporary support not only allows the door jamb to be held in place as it is supposed to be, but it clears up room for the rest of the process.
Attaching the door trimming; while largely cosmetic; is still an important part of the process. One practical use for it is that it does prevent airflow around the doorway, but its main purpose is to make the doorway look nice. Even plain trimming makes the door look better.
Securing the door fixture helps make sure that the door will latch properly when it is shut. If the doorknob is not already installed in the door, this is the time to install it as well. Once the doorknob and fixture are attached, the door needs to be tested again.
Just recheck that your door lever working or not. If looks good go ahead to the next step.
The final step is to test the door to make sure that there are no problems. This will involve opening and shutting the door several times. The goal is to make sure that the door latches right, shuts evenly and that the job is truly done.
Installing an interior door is an important part of the construction of a building. It can also be an important part of the upkeep of an existing building. If you own your own home, it can be a helpful skill that will save you money. In any case, installing an internal door is a useful skim to have.
Recommended article for you: https://homerdiy.com/fixing-squeaky-door-hinges/

About James Williams
Hi, This is James from HomerDIY. I have great experience in writing about everything related to Pump and DIY tools. For the last few years, I am researching the different types of tools and sharing my opinion on this blog.
 |
 |
 |
 |
Popular Posts
 Homer
Homer