by James Williams
Painting a door can be quite daunting if you want to get it done yourself to save that extra couple of bucks. But knowing how to paint yourself a wooden door properly and the tricks of the trade for a project like this will give it a professional touch.
The color of the door will determine that room’s complete décor, as contrasting colors or decorative panels, makes a bold statement that can brighten up an otherwise lackluster room.
You can paint the door without taking it off its hinges, but to achieve that professional look, it’s better to paint it on a clean workspace by removing it first.
This article will help you add your own personal flair to your décor without breaking the bank, with just a little bit of elbow grease!

Prepping your door before painting not only helps save time after you start the project, but it also helps you avoid small mistakes that often goes overlooked.
Following the prepping steps are also essential for the paint to last longer and helps get a much cleaner end result.
Use a hard rubber sanding block for specific profiles. Apply sandable filler on any dents and holes, if necessary.
If you find any missed spots that require more filler after priming, mark that spot with masking tape so you can fill it up later.

Step 1: Remove all hardware from the door and place them in labeled zip-lock bags to avoid mix-up when reinstalling.
Remove the paint build-up around the hardware beforehand using a paint stripper or a putty knife, as it can cause splinters while uninstalling.
Step 2: Clean the door with a strong grease removing the household cleaner. The paint will not adhere to the grease build-up, especially the area around the door handle.
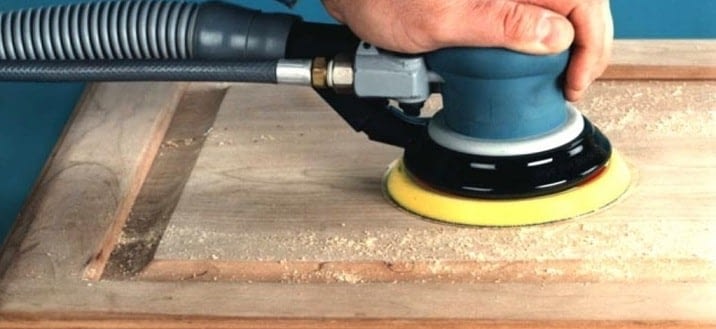
Step 3: A light sanding is required to properly apply the primer. Use a 180 or 220 grit sandpaper to remove and smooth out any imperfections.
Use sanding paper of sanding blocks that are intended for painting, and apply a rougher block to clean the problem areas.
Step 4: Use an orbit sander on flat areas, and acquire several shapes of sanding sponges for specific edges of the door.
Ask the handyman at your local hardware store for specifics on the type of paint used for the previous paint job, as it may cause heat build-up from the sanding.
Step 5: Make sure your workspace is clean from dirt and sawdust. Use a vacuum with a brush attachment to remove any excess dust and keep all the doors and windows closed and airtight while working.
Any floating dust can stick to your paintbrushes and slow down your drying process, as smoothing the paint can take time.
Step 6: Install proper lighting to avoid uneven areas and ridges. Gather all your tools in your workspace, so you don’t have to leave the room and risk raising any dust.
Step 7 (Optional): If the door needs to be reinstalled quickly, it’s better to create a rotating function to finish the project faster.
To do this, drill one 3/16-inch hole on the bottom edge of the door and similarly two holes on the top and drive 1-1/2-inch lag screws into the door. Balance the door on sawhorses on each side and make sure the sawhorses only touch the screws and not the edges of the door to make it easily flip.
Although priming the whole door is ideal, but you can only prime dents and patches if you’re on a time crunch. But for a cleaner finish and for the paint to adhere better, it’s better to prime the entire door.
If you use latex paint on a door that was previously painted using oil-based paint, prime according to the type of paint used on the door.
To find out which type of paint was previously used, apply rubbing alcohol to a rag and rub off the old paint. If it manages to take the paint off, it is latex paint, and if not, it’s oil-based.
Based on the color you choose for your door, make sure to have the primer tinted to that color for a much smoother effect.

Step 1: Ask the handyman at your local hardware store for the right primer for the type of paint you are about to use. Acquiring the right type of primer helps with the sanding and smooths out the paint.
Step 2: Apply the primer with the foam brush and start along the edges and move to the face of the door. Use a similar method to prime as you will for the paint.
Flatten the primer to avoid ridges, and make sure it doesn’t get on the profile while you’re working on the edges.
Step 3: For a glossy finish, apply two thick coats of primer and lightly sand the main coat after drying. Use a 220 grit sanding block to grate the layers of primer.
Dry each coat for at least 30 minutes to an hour, as the sanding would be smoother depending on the drying process. Check the process by applying light on a low angle and checking for ridges and imperfections.
Make sure the primer is fully dry before getting ready to paint. Vacuum and wipe any excess dust with a damp rag. Buy a compatible paint additive or thinner from your local hardware, which will slow down the drying process and help you level the paint.
Dampen the floor before putting on the paint or primer. This prevents the dust from getting airborne and raising the humidity, which extends your time frame for drying.
Keep a pair of tweezers nearby to help you remove any external material to get stuck to the wet paint.
Avoid painting the hinges and hardware by covering them with masking tape before starting to paint.
Buy samples of paint to swatch the colors and check them on different intervals, depending on how the color changes based on the lighting.

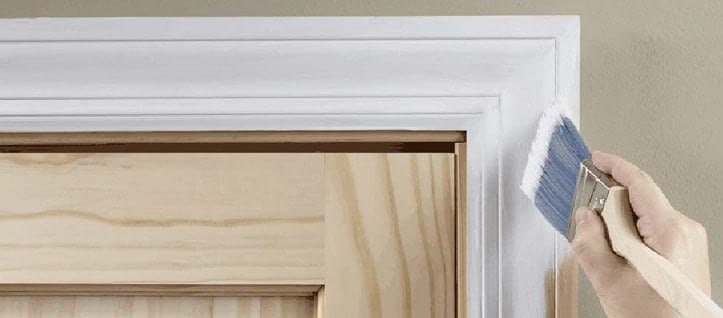
Step 1: Use a 2-inch sash brush a mini roller to apply the paint in a light coat. Start with the edges because if any paint drips down to the face of the door, you can smooth it out before coating the face.
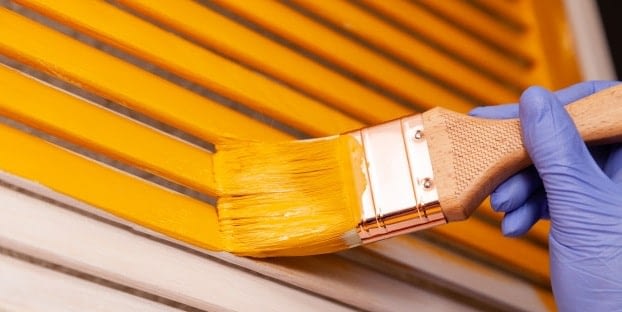
Start with a relatively light layer, as you will slowly get used to the leveling of the paint. Painting on wood depends on a lot of trials and error, and starting with a light coat can help you smooth out your brush marks.
Step 2: After you’re done with the edges, paint along the panels or corners of the door. Coat the faces and top of the panels with a roller and make sure to quickly brush over the profiles around the panels.
Rollers give you a small time-frame before the paint hardens, so brush in any rolled paint while it’s still wet.
Step 3: Roll across the face of the door in sections, as this makes brushing with the grain easier and avoiding any ridges.
Use the sash brush to paint the across where the edges meet the panels. Paint in a straight line inside the intersection or the cross space and follow the grain to avoid any folds or sloppy brushwork.
Step 4: Apply several coats and sand in-between when it’s dry (30-45 mins) to help the paint adhere better.
The end result of the sanding would depend on the drying conditions. Make sure to properly dry between each coat and brush out any imperfections before completely drying.
Warning
Let the paint cure for at least 2 days before putting it up for service, as certain paint can be dry to touch, but it can still stick to the side of the doorstop.
Apply weather stripping or painter’s tape along the doorstop to prevent this from happening. This is especially prone to occur when the weather is humid.
Painting an old door will not only brighten up any room but also can easily create a fantastic contrast between the blend of colors to your rooms.
Choose a bright or contrasting color for your door instead of the same shade as the walls. Adding a different color creates more of an impact on your room, especially if the door is of a unique model.
Update your door with new hardware to make a huge difference. This way, you can pick a handle of a twist knob according to your own preference.
If you’re fussy about keeping your room in tune with your personal style, then it’s better to take this project into your own hands and match your own aesthetic!
About James Williams
Hi, This is James from HomerDIY. I have great experience in writing about everything related to Pump and DIY tools. For the last few years, I am researching the different types of tools and sharing my opinion on this blog.
 |
 |
 |
 |