by Lucas Lee
Modern refrigerators nowadays come with an innovative defrost timer feature that automatically turns on the defrost. This device is capable of melting frost and preventing unnecessary build-up inside the fridge. In short, it is a helpful timer that protects your refrigerator from damage.
What if you notice frost build-up despite having a timer? It simply means that there must be something wrong with that device.
But how can you test the functionality of such a complicated timer? Luckily, I faced the same problems and decided to research how to test defrost timer. In this guide, I will be showing you how you can effortlessly check and manage this device.
Contents
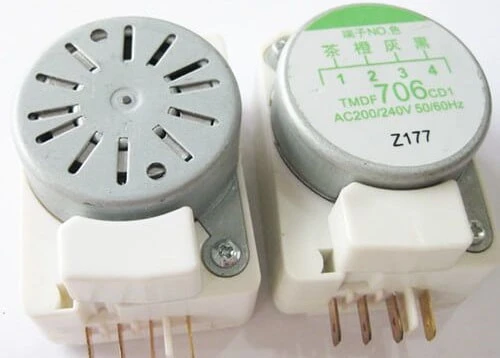
It is a simple motor-driver device that controls the defrost cycles by opening and closing internal contacts. Why is this important?
The internal contacts maintain the electric current flow to the defrost heating element and compressor. In older refrigerators, this type of mechanical kitchen timer allows the current to flow continuously.

However, in the newer models, manufacturers build the timer in a way that it will only function when the defrost cycle is running. Primarily, there are two types of defrosting timers- continuous and accumulative timers.
The former one runs if you keep the refrigerator’s plug-in continuously. On the other hand, the latter one works when the compressor functions.

Now that we know about a defrost timer’s basics, let us dive right into how you can test it. I will be methodically telling you the fundamental steps that will allow you to test the refrigerator defrost timer in no time.
The defrosting and cooling of your refrigerator maintains a rhythm, just like a clock. So when might you need to test the timer?
This frosting and defrosting mechanism depend on a pre-set time interval. You will have to test the timer if it fails to switch over between these two mechanisms.

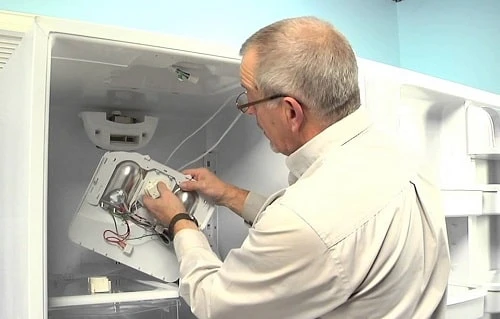
The timer will be behind the temperature control if you own a top refrigerator. One or a few screws may secure this device in place. In some models, it is behind the front grill “toe-kick” portion of the freezer.
In the case of a power outlet timer, you have to remember to unplug the refrigerator before moving onto this stage. Since you will be dealing with electrical components like a timer, it is better to turn off the power to avoid accidents.

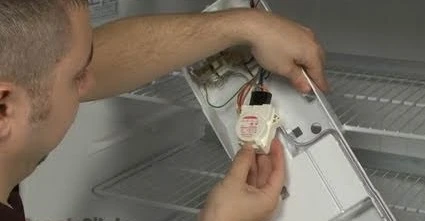
Once you turn off the power, go ahead and locate the timer. It may contain one or more screws that you will have to unthread in order to pull out the device forward. I urge you not to pull it out completely, just enough so that you have no trouble removing the wire connectors at the back portion.
There is also an advanced screw that you can remove to check whether the defrost cycle is failing to advance. Turn the screw clockwise, and after some time, you will hear a “click” noise. This noise is an indication that the cycle of your freezer moved on to the next one.
Meaning, if it was in the cooling cycle previously, it will now move on to the defrosting process. Now, you have to wait approximately 35 minutes to check whether this cycle has left the defrosting mode and moved onto the cooling mode.
You can also listen to the compressor noise to determine that this change happened. What steps you will move on next depends on this timer cycle process.
If you notice that the cycle is not moving as it should, you may have to change the timer motor. However, if it does function appropriately, you will have to move on to testing the switch electrically. You can also use this method to do a frigidaire defrost timer test.
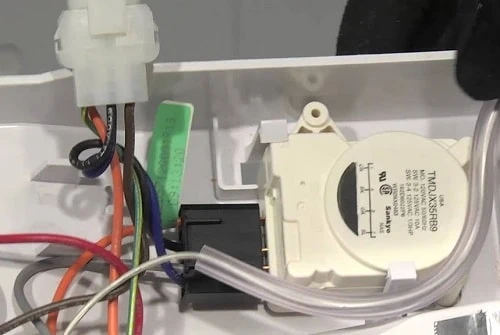
Besides the advanced screw, there are also several screws that hold the timer in place, as previously mentioned. In order for wiring connector disconnection, you will have to remove these screws and gently pull out the timer device. You can also firmly pull and rock the connector from left and right to remove it properly.
Luckily, manufacturers key the connector in such a way that you can only replace it from one angle. Therefore, no need to worry about the wire’s positions and note them.

Next, you will need a multi-tester to test the continuity of the timer. It contains ohms setting X1; set up this X1 setting before moving on to the next step. Now, you will notice that there are specifically four different terminals and a common terminal. This common terminal contains either a “3” or “C” label.
For some reason, if your device does not include a label, then do not be worried; you can still determine the common terminal by taking note of the terminal that coincides with the connector plug’s white wire.
Touch one of the probes to the common terminal and another probe to the rest of the terminals. You will notice the multi-tester showing a zero or near zero ohms reading for one/two terminal pairs. This reading indicates continuity. Furthermore, please take note that the third terminal pair will not show any continuity reading.
Now, go ahead and locate the timer switch. Move this switch clockwise, unlike you hear a “click” noise just as before. This noise will indicate that you have reset the timer back to the previous cycle mentioned in the “advance screw” part.
If you manage to maintain all the timer testing steps that I have mentioned, you will notice the problem right away. Now, what is all the fuss about this timer? It is important because it helps regulate the defrosting cycle of your freezer correctly.

Your refrigerator contains time intervals where the cooling and defrosting process takes part after specific time intervals. A defrost timer test is essential to keep the cycles in check. The device that maintains and regulates the continuity of this mechanism is the defrost timer.
Interestingly, you can use it to set up the defrosting time so that the freezer functions normally.
Dealing with a complicated timer device of your freezer is not an easy task. But why go for professional help when you can check out the timer’s functions effortlessly? If you follow my guide on how to test a defrost timer, I guarantee that you will identify the problem in no time.
Remember, testing the timer device is always cheaper than replacing it. However, if the timer indicates faulty readings, then it will be better to replace the timer motor instead of just leaving it that way.

About Lucas Lee
Lucas Lee was raised outside the city of Livermore, in the legendary Bay Area of North California. Lucas considers his family and researches to be most important to him. If he isn’t hanging out with his loved ones, you can almost always find him around his sweet little garden of fruits right in the backyard of his lovely home.
 |
 |
 |
 |